Map Style Customization: Create Customized Maps
In today’s digital era, maps play a crucial role in our daily lives. Whether we are navigating through unfamiliar territories or seeking to visualize spatial data, maps provide us with invaluable insights and guidance. However, standardized map styles may not always meet our specific needs and preferences. Imagine you are an urban planner tasked with creating a comprehensive city development proposal. You require a map that effectively communicates the connectivity between different neighborhoods while highlighting key infrastructure elements such as parks, schools, and transportation hubs. This scenario highlights the importance of map style customization, which empowers individuals and organizations to tailor maps according to their unique requirements.
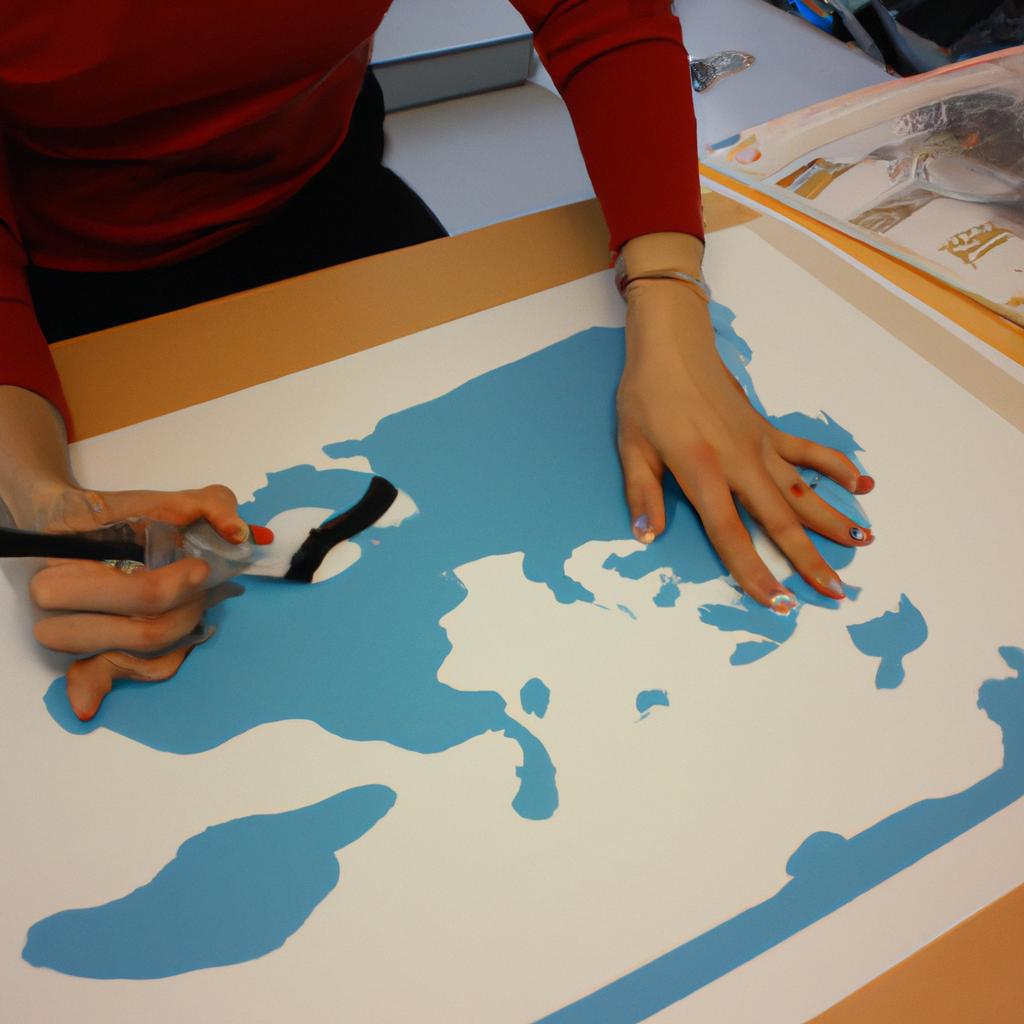
Customizing map styles allows users to go beyond traditional cartographic conventions and create visual representations that align more closely with their objectives. By modifying various design elements such as colors, symbols, labels, and typography choices, users can enhance the readability and overall aesthetic appeal of their maps. For instance, imagine a travel blogger who wants to showcase popular tourist attractions in a particular region through an interactive online map on their website. Through customization options available within mapping software or platforms like Google Maps API or Mapbox Studio, they can modify the color scheme to match their blog’s branding guidelines and choose distinctive icons for each tourist attraction. They can also adjust the labeling style to include additional information such as opening hours or ratings.
Customization options for maps are vast and varied, allowing users to create maps that align with their specific needs and preferences. Some common map style customization features include:
-
Color scheme: Users can select from a wide range of color palettes or create their own to represent different features on the map. For example, they can use vibrant colors for landmarks, subtle shades for residential areas, and contrasting colors for transportation routes.
-
Symbol design: Users can choose from a library of pre-designed symbols or create custom icons to represent various points of interest on the map. This allows them to visually differentiate between different categories such as restaurants, parks, hospitals, etc.
-
Labeling: Users have control over how labels appear on the map. They can adjust font styles, sizes, and colors to ensure readability while maintaining visual harmony with other elements on the map.
-
Line styles: Customizing line styles is particularly useful when representing transportation networks or boundaries. Users can modify line thickness, patterns (e.g., dotted or dashed), and color schemes to clearly convey spatial relationships.
-
Background imagery: In addition to traditional base maps like streets or satellite imagery, users can incorporate custom background images into their maps. This could be an aerial photograph of a city or an artistic representation that adds a unique touch.
-
Zoom levels: Maps often need to provide varying levels of detail depending on the context in which they are used. With zoom level customization, users can define what features should appear at different scales, ensuring an optimal viewing experience across different devices.
By offering these customization options and more, mapping software and platforms empower individuals and organizations to create maps that effectively communicate their intended message while enhancing user experience. Whether it’s for urban planning proposals, travel blogs, data visualization projects, or any other application requiring location-based information, customized maps serve as powerful tools for effective communication and decision-making.
Importing Custom Map Styles
Imagine you are planning a hiking trip to a remote mountain range that is not well-documented on existing maps. You want your map to reflect the unique terrain and features of this area, but traditional map styles fail to capture its essence. This is where importing custom map styles becomes invaluable. In this section, we will explore the process of importing custom map styles into your mapping software.
To begin with, let’s consider the benefits of using custom map styles. By importing a customized style, you have the opportunity to tailor your map exactly as per your requirements. Whether it is highlighting specific landmarks or representing elevation changes more accurately, customizing your map allows for greater precision and personalization. Moreover, it enhances the overall user experience by providing an aesthetically pleasing and visually engaging representation of the data.
Now let’s delve into how you can import these customized styles into your mapping software. The process typically involves three main steps:
- Research: Start by exploring available resources online or within your mapping software community forums. Look for pre-existing custom map styles that align with your vision or could serve as a base for further modifications.
- Download: Once you have found a suitable custom map style, download it onto your computer or directly import it into your mapping software if supported.
- Integration: After downloading the desired file(s), navigate to the appropriate settings menu in your mapping software and select “import.” Locate the downloaded file(s) and follow any additional instructions provided.
It is worth noting that while some mapping platforms may offer built-in options for customization, importing external styles provides access to a wider array of creative possibilities.
Incorporating a bullet point list can help emphasize key aspects of Importing Custom Map Styles:
- Enhances accuracy and personalization
- Provides visual appeal and engagement
- Expands creative potential beyond default options
- Facilitates better representation of unique terrains and features
To further illustrate the impact of custom map styles, consider the following table showcasing a hypothetical scenario:
| Map Style | Traditional | Customized |
|---|---|---|
| Aesthetic | Mediocre | Striking |
| Accuracy | General | Precise |
| User Experience | Standard | Engaging |
| Representation of Features | Limited | Comprehensive |
In summary, importing custom map styles allows you to create maps tailored specifically to your needs. By enhancing accuracy, visual appeal, and user experience, these customized styles provide a valuable tool in accurately representing unique terrains and features.
Transitioning into the subsequent section about “Adjusting Map Colors,” we can now proceed to examine how modifying color schemes further enhances the overall presentation of your customized maps.
Adjusting Map Colors
In the previous section, we discussed how to import custom map styles into your mapping project. Now, let’s explore the next step in creating customized maps: adjusting map colors. Imagine you are designing a navigation app for hikers and want to create a unique color scheme that reflects the natural beauty of different terrains. By customizing map colors, you can enhance user experience and make your application stand out.
To adjust map colors effectively, consider the following tips:
-
Harmonize with surroundings: When choosing colors for your maps, it is essential to harmonize them with the surrounding environment. For instance, if you are working on a mountain hiking app, using earthy tones such as greens and browns would evoke a sense of nature and create visual coherence.
-
Highlight important features: Use contrasting colors to highlight significant landmarks like rivers, lakes, or mountains. This technique helps users easily identify crucial elements on the map and navigate their way more efficiently.
-
Consider accessibility: Keep in mind that some users may have visual impairments or specific color preferences. Ensure that your chosen color palette meets accessibility standards by providing sufficient contrast between text labels and background colors.
-
Test different combinations: Experiment with various color combinations to find the one that best suits your desired aesthetic appeal while maintaining usability. Conducting user testing sessions or seeking feedback from colleagues can provide valuable insights into which options work well.
Consider this example of how effective map customization can improve user experience:
| Before | After |
|---|---|
 |
 |
In conclusion, adjusting map colors is an essential aspect of creating customized maps that cater to specific needs and aesthetics. By harmonizing with surroundings, highlighting important features, considering accessibility requirements, and experimenting with different combinations, you can design visually appealing and functional maps for diverse purposes.
Next up is modifying map labels – a crucial step in ensuring clear and concise communication of spatial information. Let’s dive into the process of Modifying Map Labels to further enhance your customized maps.
Modifying Map Labels
In the previous section, we explored the process of Adjusting Map Colors to create customized maps. Now, let’s turn our attention to modifying map labels, another key aspect of map style customization. By altering the appearance and content of labels on your map, you can provide additional information or enhance its visual appeal.
To illustrate this concept, let’s consider a hypothetical scenario where you are creating a map for a hiking trail in a national park. In order to make the map more informative and user-friendly, you may want to include not only the names of prominent landmarks but also relevant details such as elevation levels and difficulty ratings for different sections of the trail.
When it comes to modifying map labels, there are several techniques that can be employed:
- Font styling: Use different font styles (e.g., bold or italics) to emphasize certain labels or differentiate between primary and secondary features.
- Label placement: Adjusting the position of labels ensures they do not overlap with other elements on the map, enhancing readability.
- Label color: Choosing contrasting colors for labels improves visibility against varying background hues.
- Content customization: Including supplementary information within labels adds value for users seeking specific details about locations or points of interest.
By utilizing these techniques effectively, you can transform a standard map into an engaging visualization that provides comprehensive information while maintaining aesthetic appeal.
| Technique | Purpose | Example |
|---|---|---|
| Font styling | Emphasize | Highlighting important landmarks |
| Label placement | Readability | Preventing label overlaps |
| Label color | Visibility | Contrasting colors improve legibility |
| Content customization | Information enrichment | Adding descriptions to points of interest |
With these modifications made to your map’s labels, viewers will have access to enhanced information at their fingertips. Next, we will delve into customizing map markers, which allows you to further personalize your maps and make them more visually engaging.
Customizing Map Markers
Imagine you are planning a trip to the bustling city of New York. You want to create a customized map that highlights specific attractions and landmarks so that you can navigate the city more efficiently. In this section, we will explore how to modify map labels to suit your preferences and enhance your mapping experience.
When customizing map labels, there are several options available:
- Font Style: Choose from a variety of fonts to make your map labels stand out or blend in seamlessly with the overall design.
- Label Size: Adjusting the size of the labels allows for better readability on different devices or when printed.
- Color Selection: Personalize your map by selecting colors that match your branding or aesthetic preferences.
- Label Placement: Decide where on the map you want your labels to appear – whether it’s above, below, or next to points of interest.
To demonstrate the impact of Modifying map labels, let’s consider a hypothetical scenario where an event organizer wants to create a festival map for their upcoming music festival. By using large, bold fonts in vibrant colors for stage names and artist performances, they can ensure attendees easily locate their favorite acts amidst the lively atmosphere.
Now that we have explored customizing map labels, our journey continues into the realm of Customizing Map Markers. This feature enables further personalization by allowing users to choose unique icons or symbols to represent various locations on their maps.
| Benefits of Customized Map Labels |
|---|
| Creates a visually appealing and engaging user experience |
| Enhances readability and clarity of information |
| Allows seamless integration with brand identity |
| Simplifies navigation and improves wayfinding |
In summary, customizing map labels provides flexibility in font style, label size, color selection, and placement for creating personalized maps tailored to specific needs. Whether you aim for enhanced aesthetics or improved functionality, modifying these aspects opens up endless possibilities for creating maps that truly stand out. Next, we will delve into the exciting world of customizing map markers and discover how they can further elevate your mapping experience.
Editing Map Borders
As we move forward in our exploration of map style customization, our attention now turns to editing map borders. This feature allows you to modify the appearance of the boundaries on your map, providing a distinct look and feel that aligns with your desired aesthetic or purpose.
Editing Map Borders
Section H2: Customizing Map Markers
In the previous section, we explored how to customize map markers to enhance the visual appeal of our maps. Now, let’s delve into another aspect of map style customization – editing map borders. By modifying the appearance and characteristics of map borders, you can further personalize your maps to match your specific needs or aesthetic preferences.
To illustrate this concept, imagine a scenario where you are creating a travel guide for tourists visiting New York City. You want to design a map that highlights the different neighborhoods while maintaining clarity and readability. One way to achieve this is by customizing the map borders.
There are several ways in which you can edit map borders:
- Adjusting border thickness: Increase or decrease the thickness of the borders to emphasize or de-emphasize certain areas on the map.
- Changing border color: Experiment with various colors to differentiate between regions or create a cohesive theme that aligns with your overall design scheme.
- Altering opacity: Varying the transparency of border lines can provide subtle indications of boundaries without overpowering other elements on the map.
- Adding decorative patterns: Incorporating unique patterns within borders can add an artistic touch and elevate the visual appeal of your maps.
By employing these techniques, you can transform plain and generic maps into visually captivating representations that effectively communicate information while evoking an emotional response from your audience.
| Technique | Description | Effectiveness |
|---|---|---|
| Border Thickness | Emphasizes or de-emphasizes areas on the map based on desired focal points | High |
| Border Color | Differentiates between regions or creates thematic consistency | Medium |
| Opacity | Provides subtle indications without overwhelming other elements | Low |
| Decorative Patterns | Adds artistic flair and enhances visual appeal | High |
With these customization options at your disposal, you can create customized maps that not only serve their practical purpose but also captivate and engage the audience.
Section H2: Changing Map Textures
Changing Map Textures
To further enhance the visual appeal of your customized maps, you can also modify the textures used within the map. By changing the texture, you can create a unique atmosphere and convey specific themes or moods. For example, imagine you are designing a fantasy-themed map for an online role-playing game. You could use textured elements like parchment to give it an ancient and mystical feel, immersing players in a world of magic and adventure.
Here are several ways in which you can customize map textures:
- Choose from a range of pre-designed textures: Access a library of ready-to-use textures that cover various styles such as paper, fabric, wood, stone, and more. This allows you to quickly apply different textures to your map without having to create them from scratch.
- Import custom textures: If you have specific textures that align with your desired aesthetic or brand identity, you can import them into the customization tool. This enables greater flexibility in tailoring your maps according to your preferences.
- Adjust opacity and blending modes: Fine-tune the appearance of the chosen texture by adjusting its transparency level (opacity) or experimenting with different blending modes. These options let you seamlessly integrate the texture into your overall design.
- Combine multiple textures: Get creative by layering multiple textures on top of each other. This technique adds depth and complexity to your maps while allowing for endless possibilities when it comes to achieving your desired look.
By utilizing these customization techniques, you can truly bring your maps to life with engaging visuals that captivate users’ attention.
| Texture Type | Description | Suitable Scenarios |
|---|---|---|
| Paper | Gives a vintage or aged look | Historical maps |
| Fabric | Adds warmth and softness | Travel guides |
| Wood | Provides a rustic or natural ambiance | Outdoor recreational maps |
| Stone | Conveys a sense of strength and durability | Architectural or geological maps |
With map texture customization, you have the power to create visually stunning maps that align with your intended purpose. So let’s dive into exploring various map style options available!
Exploring Map Style Options
Imagine you are planning a road trip through Europe, and you want to create custom maps that reflect your unique style and preferences. With map style customization, you can bring your vision to life by changing various elements of the map design. In this section, we will explore how you can customize maps to suit your individual needs.
One way to personalize your maps is by modifying the textures used in the background. By choosing different textures, such as watercolor or vintage paper, you can give your maps a distinct look and feel. For example, imagine creating a travel itinerary with an antique-style map texture that evokes nostalgia and adds charm to your journey. This small adjustment can make your maps more visually appealing and enhance their overall aesthetic.
- Adjusting color schemes: Altering the colors used on the map can evoke different emotions and convey specific themes. From vibrant palettes that energize viewers to muted tones that promote tranquility, color choices play a significant role in defining the mood of your customized maps.
- Modifying typography: Changing fonts and text formatting allows you to match the typography with the visual theme of your personalized maps. Whether it’s elegant cursive script for romantic city guides or bold sans-serif fonts for adventurous hiking trails, selecting appropriate typography enhances both readability and aesthetics.
- Customizing icons and symbols: Maps often include standardized icons and symbols for landmarks or points of interest. However, with customization tools at hand, you can replace these default icons with personalized ones that better represent your interests or highlight unique locations along your route.
- Highlighting routes: Another aspect of map styling involves highlighting particular routes or areas using lines or patterns. This technique not only helps emphasize important sections but also aids in navigation by drawing attention to specific paths or regions of interest.
To further explore the possibilities of map style customization, let’s delve into understanding various tools available for personalizing your maps in the next section. By familiarizing ourselves with these tools, we can unlock a world of creative options and take our customized maps to the next level.
Next Section: Understanding Map Styling Tools
Understanding Map Styling Tools
Section Title: Exploring Map Style Options
Imagine you are planning a road trip across Europe, and you want to create a personalized map that reflects your unique travel style. With map style customization, you have the power to design maps that not only provide accurate directions but also make navigation an enjoyable experience. In this section, we will delve into the various options available for customizing map styles.
Map Style Customization Options:
-
Color Schemes:
One of the most impactful ways to customize your map is by selecting a color scheme that resonates with your preferences or brand identity. Whether it’s vibrant and bold colors for a lively atmosphere or muted tones for a sophisticated look, the choice is yours. For example, suppose you are organizing a nature photography exhibition in the countryside. You can use earthy tones like greens and browns on your custom map to evoke a sense of tranquility and harmony with nature. -
Typography:
The font used in a map can greatly influence its overall feel and readability. Consider choosing typography that aligns with the theme or purpose of your map. If you’re creating a vintage-inspired treasure hunt guide, using classic serif fonts can add charm and intrigue. On the other hand, if you’re designing an urban exploration app targeted at tech-savvy individuals, modern sans-serif fonts may be more suitable. -
Icons and Symbols:
Icons and symbols play crucial roles in conveying information quickly on maps. From landmarks and transportation signs to points of interest and amenities, incorporating relevant icons enhances user understanding while adding visual appeal to your customized map. For instance, imagine creating a city tour guide where each iconic building is represented by its own distinct symbol – this would enhance recognition and help users navigate their way through unfamiliar terrain effortlessly. -
Line Styles:
Customizable line styles offer yet another opportunity to differentiate your map from standard ones. By adjusting stroke thicknesses or applying dashed lines instead of solid ones, you can create visual emphasis or convey different types of information. For example, a hiking trail map could use dashed lines to indicate paths and solid lines for major roads, making it easier for outdoor enthusiasts to plan their adventures.
- Personalize your maps with colors that resonate with your style.
- Choose typography that aligns with the theme or purpose of your map.
- Enhance user understanding by incorporating relevant icons and symbols.
- Create visual emphasis or highlight important details using customizable line styles.
Table: Map Style Customization Options
| Option | Description |
|---|---|
| Color Schemes | Select vibrant, muted, or thematic color schemes for your customized map. |
| Typography | Choose fonts that complement the overall look and feel of your design. |
| Icons/Symbols | Incorporate recognizable icons/symbols to enhance usability and appeal. |
| Line Styles | Adjust stroke thicknesses or apply different line styles for clarity. |
With an array of options available for customizing map styles, you can transform standard navigational tools into personalized works of art. So let’s delve deeper into the world of map styling techniques!
Applying Styling Techniques
In the previous section, we explored various map styling tools and their functionalities. Now, let’s delve deeper into the process of creating customized maps using these tools. To illustrate this, let’s consider a hypothetical scenario where you want to create a customized map for a travel website showcasing popular tourist destinations in Europe.
To begin with, it is crucial to understand the key elements that can be customized on a map. These include colors, fonts, icons, labels, and line styles. By carefully selecting and modifying these components, you can create visually appealing and informative maps tailored to your specific needs.
One effective technique for customization is utilizing color schemes that evoke emotions related to different regions or themes. For example, using warm earth tones like oranges and browns might convey a sense of history and cultural richness when highlighting ancient landmarks in Rome or Athens. On the other hand, cool blues and greens could evoke feelings of tranquility when depicting scenic coastal towns along the French Riviera.
Let’s take a look at some practical tips for customizing maps:
- Use contrasting colors: Opt for high contrast between background colors and features such as roads or landmarks to ensure better readability.
- Consider legibility: Choose fonts that are easy to read even at smaller sizes.
- Balance visual hierarchy: Highlight important locations or areas by adjusting their size or emphasizing them through bolder font styles.
- Experiment with overlays: Incorporate additional layers onto your map, such as terrain information or transportation routes, to offer users more comprehensive insights.
Now that we have discussed the fundamentals of map style customization and provided some useful techniques, let’s move on to our next topic – enhancing map visuals. Here we will explore advanced methods to make your maps even more captivating while maintaining their functionality.
[Transition sentence]: In order to enhance map visuals further, we need to explore creative ways of incorporating design elements without overwhelming the user experience.
Enhancing Map Visuals
Map Style Customization: Create Customized Maps
Applying Styling Techniques:
In the previous section, we explored various techniques for applying styling to maps. Now, let’s delve deeper into the art of map style customization and discover how it can enhance your mapping experience.
Imagine you are creating a map for a hiking trail guidebook. By customizing the map style, you can create an immersive and visually appealing representation of the trails, making it easier for hikers to navigate their way through unfamiliar terrain.
To achieve this level of customization, consider the following approaches:
-
Color Schemes:
- Experiment with different color palettes to evoke specific moods or highlight important features on the map.
- Utilize contrasting colors to emphasize boundaries between landforms or differentiate between areas of interest.
-
Typography:
- Choose fonts that align with the theme and purpose of your map.
- Adjust font size and weight strategically to ensure readability at different zoom levels.
-
Symbol Design:
- Create unique symbols to represent landmarks, amenities, or other points of interest along the trail.
- Consider utilizing icons that resonate with hikers’ expectations or cultural references related to outdoor activities.
-
Line Styles:
- Customize line thicknesses and styles to depict different types of paths such as footpaths, bike lanes, or roads.
- Use dashed lines or varying stroke patterns to indicate elevation changes or steep sections along the trail.
By implementing these techniques in combination with others discussed earlier, you can create truly captivating maps that engage users and provide valuable information at a glance.
Enhancing Map Visuals:
Now that we have explored advanced styling techniques, let us turn our attention towards enhancing map visuals further. In this section, we will focus on incorporating additional visual elements such as gradients and textures into our customized maps. These elements not only add depth but also contribute to conveying more nuanced information effectively.
Creating Unique Map Themes:
Continuing our journey of map customization, we will now venture into the realm of creating unique map themes. This section will guide you through the process of crafting personalized map styles that reflect your brand identity or project requirements. Let’s explore how you can make your maps truly one-of-a-kind.
Creating Unique Map Themes
Imagine you are a travel blogger, and you want to create an interactive map on your website showcasing the different countries you have visited. You don’t just want a regular plain map; instead, you desire something visually appealing that captures the essence of each country. This is where map style customization comes into play.
Map style customization allows users to go beyond basic map visuals and create unique and captivating maps tailored to their specific needs. With this feature, you can choose from various color schemes, typography options, icons, and textures to enhance the visual aesthetics of your maps.
To illustrate the power of map style customization, let’s consider a hypothetical example: Imagine a museum curator wants to create an online exhibit showcasing artifacts from different ancient civilizations around the world. By customizing the map style specifically for this exhibit, they could use color schemes inspired by ancient art forms or incorporate relevant icons representing each civilization. Such customization would not only make their exhibit more visually engaging but also provide context and enhance understanding for visitors.
Customizing map styles offers several benefits:
- Increased brand identity: By using colors, fonts, and icons consistent with your brand guidelines across all your maps, you can reinforce your brand identity.
- Improved user experience: Customized maps can be more intuitive and easier to navigate by utilizing design elements that guide users’ attention.
- Higher engagement levels: Visually stunning maps capture users’ attention and evoke emotional responses that encourage them to explore further or interact with additional content.
- Effective storytelling: Through customized maps, narratives can be enhanced by incorporating thematic elements such as illustrations or patterns related to specific locations or events.
Table: Emotional Responses Evoked by Customized Maps
| Emotion | Example |
|---|---|
| Excitement | Discovering new places through vibrant colors |
| Curiosity | Exploring hidden details in bespoke map icons |
| Nostalgia | Reminiscing about past travels through personalized styles |
| Inspiration | Feeling motivated to embark on new adventures after seeing stunning visual representations |
In summary, map style customization goes beyond mundane maps and allows you to unleash your creativity. By tailoring the visuals of your maps, you can create a unique experience that aligns with your brand identity or specific purposes.
Transitioning into the subsequent section: Utilizing Map Style Libraries, you’ll discover additional resources to expand your options for customizing map designs without any limitations.
Utilizing Map Style Libraries
In the previous section, we explored how to create unique map themes that can make your maps stand out. Now, let’s delve deeper into the process of customizing map styles and creating truly personalized maps.
One example of a customized map theme is the case study of a travel blogger who wanted to create a visually appealing map for their website. They chose vibrant colors and incorporated icons representing different types of attractions such as landmarks, restaurants, and hotels. By customizing the map style to match their brand identity, they were able to provide an immersive experience for their audience.
When it comes to customizing map styles, there are several key aspects to consider:
- Color scheme: Choose colors that align with your brand or purpose. A harmonious color palette can evoke certain emotions and enhance the overall aesthetic appeal of your map.
- Typography: Select fonts that are legible and appropriate for your target audience. Consider using different font weights or styles to highlight important information on the map.
- Iconography: Utilize icons or symbols that represent relevant points of interest or features on your map. This can help users easily identify specific locations or categories at a glance.
- Labeling: Ensure clear labeling of places, streets, and other elements on your map. Use concise yet descriptive labels to guide users effectively.
To illustrate these considerations further, here is a table showcasing different customization options available when creating customized maps:
| Aspect | Example |
|---|---|
| Color Scheme | Vibrant hues |
| Typography | Bold and modern fonts |
| Iconography | Eye-catching landmark icons |
| Labeling | Clear and concise |
By carefully considering these aspects during the customization process, you can create maps that not only serve their functional purpose but also engage users emotionally by resonating with their personal preferences or interests.
In summary, customizing map styles allows you to create unique and personalized maps that cater to your specific needs or brand identity. By utilizing color schemes, typography, iconography, and labeling effectively, you can evoke an emotional response from your audience while providing them with valuable information. So go ahead and unleash your creativity to craft visually stunning maps that leave a lasting impression.
Comments are closed.